
AI disclosure: this content, including any imagery, was artificially generated.
A well-designed craft room does two jobs at once: it keeps a huge amount of supplies organized and visible, and it gives you an inviting, functional space to actually create. The best craft room design ideas solve the storage problem first — because craft supplies multiply — then build a comfortable, well-lit workspace around it, whether you have a whole room or a corner.
Here are twelve ways to organize and design a craft room, plus a quick-reference table and answers to common questions.
Key Takeaways
- Great craft room design ideas start with storage: clear, labeled, and mostly visible so you can find supplies fast.
- A large, durable work surface and a pegboard or wall system are the core of a functional craft space.
- Bright, shadow-free task lighting is essential for detailed work.
- Zone the room by activity and keep frequently-used tools within arm’s reach.
1. Prioritize Clear, Visible Storage
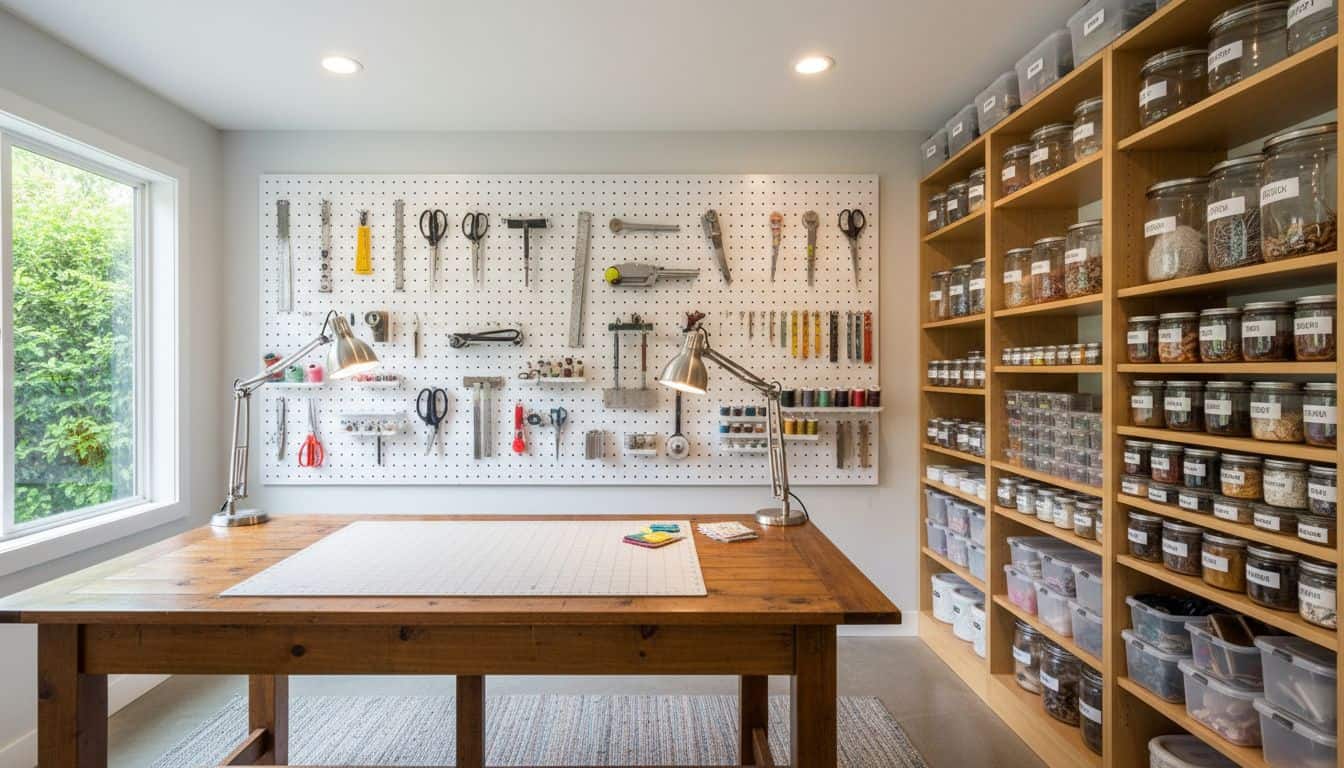
Craft supplies are only useful when you can find them, so favor clear containers, glass jars, and open shelving over solid bins. Being able to see your beads, threads, paints, and papers at a glance saves time and sparks ideas. Visible, organized storage is one of the most useful of all craft room design ideas.
2. Label Everything
Even clear storage benefits from labels. Labeling jars, drawers, and bins by category keeps the system intact and makes tidying up fast and obvious. A labeled system means supplies get put back where they belong, so the room stays organized instead of sliding into chaos after every project.
3. Install a Large Work Surface
Crafting needs room to spread out. A large, sturdy, easy-to-clean work table is the heart of the room — big enough for cutting, gluing, and assembling without cramping. A height-comfortable surface (counter height for standing work is popular) stays comfortable during long sessions. Make it the centerpiece.
4. Add a Pegboard Wall
A pegboard turns a bare wall into flexible, reconfigurable storage for tools, scissors, ribbon spools, and frequently-used items. Everything hangs in view and within reach, and you can rearrange it as your needs change. A pegboard is a craft-room classic because it’s cheap, vertical, and endlessly adaptable.
5. Get the Task Lighting Right
Detailed craft work demands bright, shadow-free light. Combine good overhead lighting with a task lamp at your work surface, and choose daylight-temperature bulbs so colors read true. Proper lighting makes fine detail easier to see and is non-negotiable for a craft room where precision matters.
6. Zone the Room by Activity
If you do several crafts, zone the space: a cutting and prep area, a main work surface, a sewing or machine station, and a drying or display spot. Zoning keeps tools grouped by task and the workflow smooth. Even in a small room, loose zones make the space far more efficient.
7. Use Vertical Storage
Craft supplies expand to fill any space, so build up. Tall shelving, stacked drawer units, hanging organizers, and wall-mounted racks use vertical space and keep the work surface and floor clear. Going vertical is essential in a small craft room and useful in any.
8. Set Up a Cutting and Prep Station
A dedicated cutting area with a self-healing mat, good scissors or a rotary cutter, and a ruler within reach keeps this messy step contained and efficient. A counter-height prep station is comfortable for standing work. Grouping cutting tools in one spot means you’re not hunting for a blade mid-project.
9. Keep Frequently-Used Tools Within Reach
Store your most-used tools — scissors, glue, pens, your go-to supplies — right at the work surface in a caddy, jar, or on the pegboard. Reserve harder-to-reach storage for things you use rarely. Keeping essentials at arm’s length keeps you in the creative flow instead of getting up constantly.
10. Add a Comfortable Chair
Crafting sessions can run long, so invest in a supportive, comfortable chair at the right height for your work surface. An adjustable task chair or a well-cushioned stool keeps you comfortable through a longer session. Comfort keeps you creating longer and makes the room a place you want to be.
11. Make It Inspiring
A craft room should spark creativity. Add a mood or inspiration board, display finished projects, paint the walls a color you love, and bring in a plant or two. A personal, inspiring space makes you want to sit down and create, which is ultimately the point of the room.
12. Build in a Cleanup System
Crafting is messy, so plan for cleanup. Keep a small bin at the work surface, a spot for scraps, and easy-to-clean surfaces. A “everything has a home” system plus quick end-of-session tidying keeps the room usable for the next project instead of becoming a pile you have to clear first.
Craft Room Essentials at a Glance
| Need | Best solution |
|---|---|
| Find supplies fast | Clear, labeled jars and open shelving |
| Room to work | Large, durable, easy-clean work table |
| Tools within reach | Pegboard wall + desk caddy |
| Detailed work | Bright, daylight-temperature task lighting |
| Small space | Vertical shelving and stacked drawers |
Frequently Asked Questions
How do I organize a craft room?
Start with clear, labeled storage — glass jars, clear bins, and open shelving — so supplies are visible and easy to find. Group items by category and activity, keep frequently-used tools at the work surface, and go vertical with shelving and a pegboard to save space.
What is the best storage for a craft room?
Clear, visible storage that’s labeled: glass jars for small items, clear drawer units, open shelving, and a pegboard wall for tools. Seeing your supplies at a glance saves time and keeps the system easy to maintain.
How do I set up a craft room in a small space?
Go vertical with tall shelving, stacked drawers, and a pegboard; use a fold-down or compact work surface; and keep only your current-project supplies out. Clear labeled storage and loose zones make even a corner craft space efficient.
What lighting is best for a craft room?
Bright, shadow-free lighting: a good overhead source plus a task lamp at your work surface, using daylight-temperature bulbs so colors read accurately. Proper lighting makes fine detail far easier to see and judge.
Bring It Together
Craft room design ideas all start with organization — clear, labeled, visible storage — then build a large work surface, a pegboard wall, and bright task lighting around it. Zone by activity, keep essentials in reach, and make it a space you’re inspired to use. Want to plan the layout before setting it up? Use the free RoomZen Room Recipe tool to map your craft room first.